Configuration of various options can be performed after a successful installation. An option can be configured by re-entering the configuration menus before booting the new FreeBSD system or after boot using sysinstall(8) and then selecting the menu.
If PPP was previously configured for an FTP install, this screen will not display and can be configured after boot as described above.
For detailed information on Local Area Networks and configuring FreeBSD as a gateway/router refer to the Advanced Networking chapter.
To configure a network device, select and press Enter. Otherwise, select to continue.
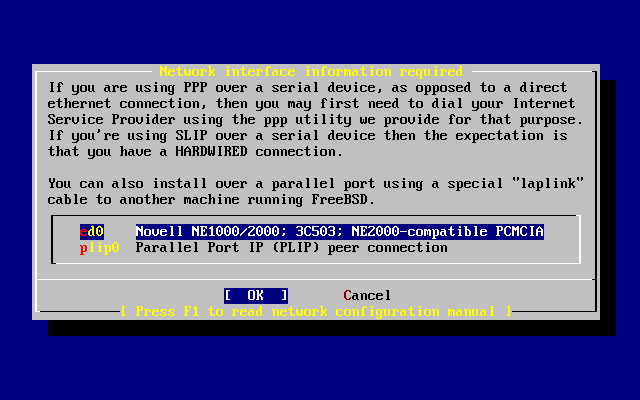
Select the interface to be configured with the arrow keys and press Enter.
In this private local area network, the current Internet type protocol (IPv4) was sufficient and was selected with the arrow keys and Enter pressed.
If connected to an existing IPv6 network with an RA server, choose and press Enter. It will take several seconds to scan for RA servers.
If Dynamic Host Configuration Protocol DHCP) is not required, select with the arrow keys and press Enter.
Selecting will execute dhclient(8) and, if successful, will fill in the network configuration information automatically. Refer to Section 29.6, “Automatic Network Configuration (DHCP)” for more information.
The following Network Configuration screen shows the configuration of the Ethernet device for a system that will act as the gateway for a Local Area Network.
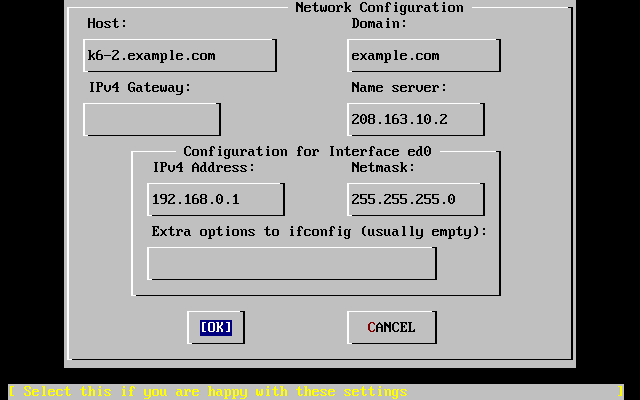
Use Tab to select the information fields and fill in appropriate information:
- Host
The fully-qualified hostname, such as
k6-2.example.comin this case.- Domain
The name of the domain that the machine is in, such as
example.comfor this case.- IPv4 Gateway
IP address of host forwarding packets to non-local destinations. This must be filled in if the machine is a node on the network. Leave this field blank if the machine is the gateway to the Internet for the network. The IPv4 Gateway is also known as the default gateway or default route.
- Name server
IP address of the local DNS server. There is no local DNS server on this private local area network so the IP address of the provider's DNS server (
208.163.10.2) was used.- IPv4 address
The IP address to be used for this interface was
192.168.0.1- Netmask
The address block being used for this local area network is
192.168.0.0-192.168.0.255with a netmask of255.255.255.0.- Extra options to ifconfig(8)
Any additional interface-specific options to ifconfig(8). There were none in this case.
Use Tab to select when finished and press Enter.
Choosing and pressing Enter will bring the machine up on the network so it is ready for use. However, this does not accomplish much during installation, since the machine still needs to be rebooted.
If the machine will be acting as the gateway for a local area network and forwarding packets between other machines, select and press Enter. If the machine is a node on a network, select and press Enter to continue.
If is selected, various services
will not be enabled. These services can be enabled after
installation by editing
/etc/inetd.conf with a text editor.
See Section 29.2.1, “Overview” for more information.
Otherwise, select to configure these services during install. An additional confirmation will display:
Select to continue.
Selecting allows services to be enabled
by deleting the # at the beginning
of the lines representing those services.

Once the edits are complete, press Esc to display a menu which will exit the editor and save the changes.
Selecting will enable sshd(8), the daemon for OpenSSH. This allows secure remote access to the machine. For more information about OpenSSH, see Section 15.10, “OpenSSH”.
Selecting the default and pressing Enter will still allow users who have accounts with passwords to use FTP to access the machine.
Anyone can access the machine if anonymous FTP connections are allowed. The security implications should be considered before enabling this option. For more information about security, see Chapter 15, Security.
To allow anonymous FTP, use the arrow keys to select and press Enter. An additional confirmation will display:
This message indicates that the FTP service will also
have to be enabled in /etc/inetd.conf
to allow anonymous FTP connections. Select and
press
Enter to continue. The following screen
will display:
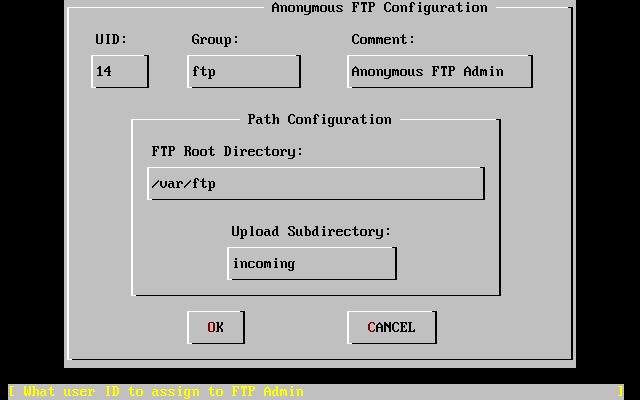
Use Tab to select the information fields and fill in appropriate information:
- UID
The user ID to assign to the anonymous FTP user. All files uploaded will be owned by this ID.
- Group
Which group to place the anonymous FTP user into.
- Comment
String describing this user in
/etc/passwd.- FTP Root Directory
Where files available for anonymous FTP will be kept.
- Upload Subdirectory
Where files uploaded by anonymous FTP users will go.
The FTP root directory will be put in /var
by default. If there is not enough room there for the
anticipated FTP needs, use /usr instead
by setting the FTP root directory to
/usr/ftp.
Once satisfied with the values, press Enter to continue.
If is selected, press Enter and the cu(1) editor will automatically start.

Use the instructions to change the message. Note the file name location at the bottom of the editor screen.
Press Esc and a pop-up menu will default to . Press Enter to exit and continue. Press Enter again to save any changes.
The Network File System (NFS) allows sharing of files across a network. A machine can be configured as a server, a client, or both. Refer to Section 29.3, “Network File System (NFS)” for more information.
If there is no need for a NFS server, select and press Enter.
If is chosen, a message will
pop-up indicating that /etc/exports
must be
created.
Press Enter to continue. A text editor will
start, allowing /etc/exports to be
edited.
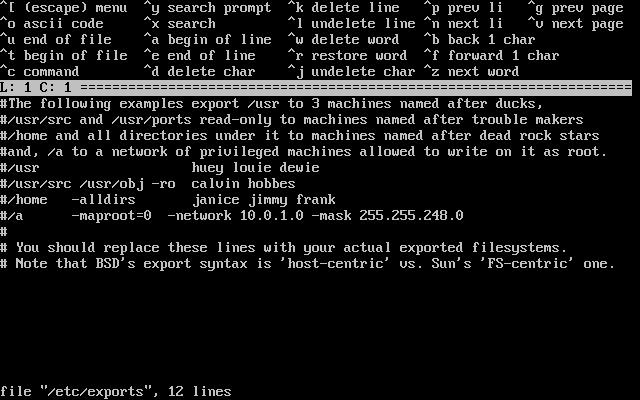
Use the instructions to add the exported filesystems. Note the file name location at the bottom of the editor screen.
Press Esc and a pop-up menu will default to . Press Enter to exit and continue.
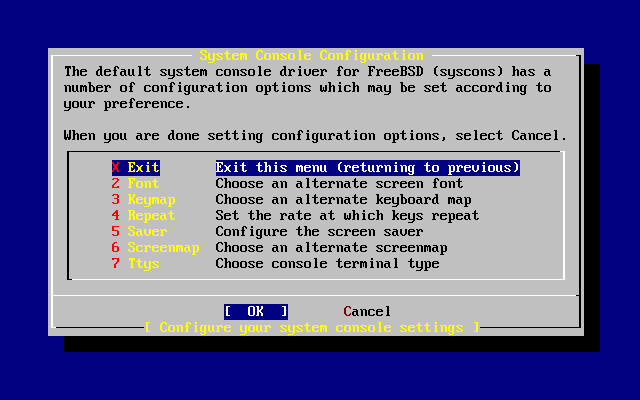
There are several options available to customize the system console.
To view and configure the options, select and press Enter.

A commonly used option is the screen saver. Use the arrow keys to select and then press Enter.
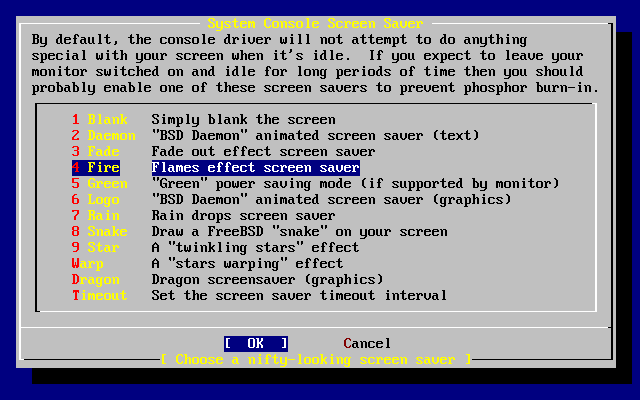
Select the desired screen saver using the arrow keys and then press Enter. The System Console Configuration menu will redisplay.
The default time interval is 300 seconds. To change the time interval, select again. At the Screen Saver Options menu, select using the arrow keys and press Enter. A pop-up menu will appear:
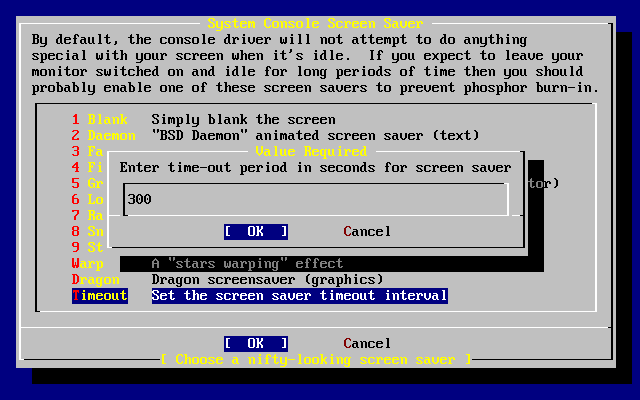
The value can be changed, then select and press Enter to return to the System Console Configuration menu.
Select and press Enter to continue with the post-installation configuration.
Setting the time zone allows the system to automatically correct for any regional time changes and perform other time zone related functions properly.
The example shown is for a machine located in the Eastern time zone of the United States. The selections will vary according to the geographic location.
Select and press Enter to set the time zone.
Select or according to how the machine's clock is configured, then press Enter.
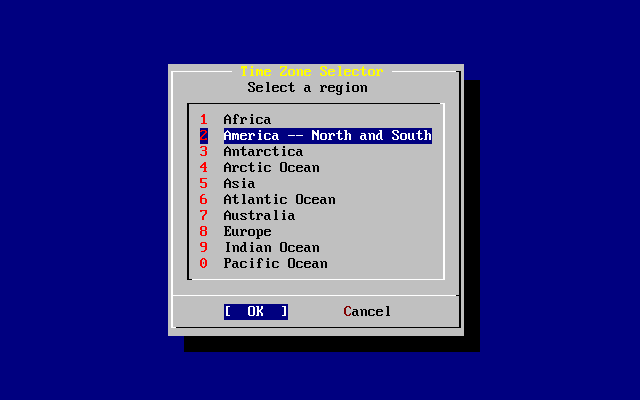
The appropriate region is selected using the arrow keys and then pressing Enter.
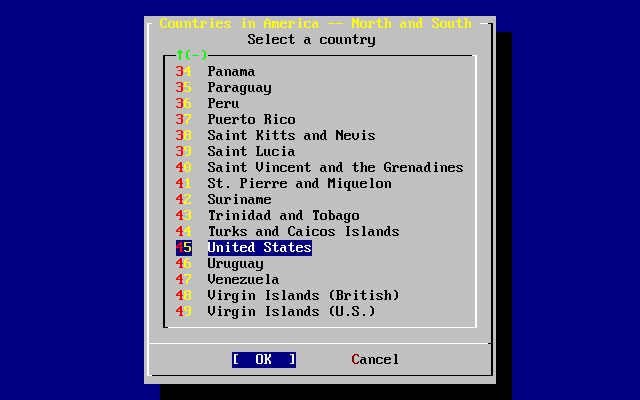
Select the appropriate country using the arrow keys and press Enter.
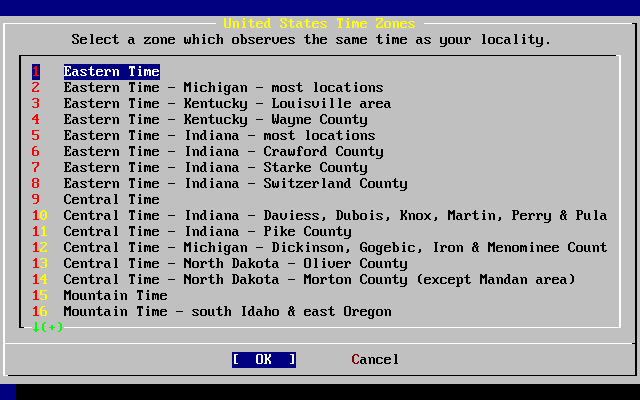
The appropriate time zone is selected using the arrow keys and pressing Enter.
Confirm that the abbreviation for the time zone is correct. If it looks okay, press Enter to continue with the post-installation configuration.
This option allows cut and paste in the console and user programs using a 3-button mouse. If using a 2-button mouse, refer to moused(8) for details on emulating the 3-button style. This example depicts a non-USB mouse configuration:
Select for a PS/2, serial, or bus mouse, or for a USB mouse, then press Enter.
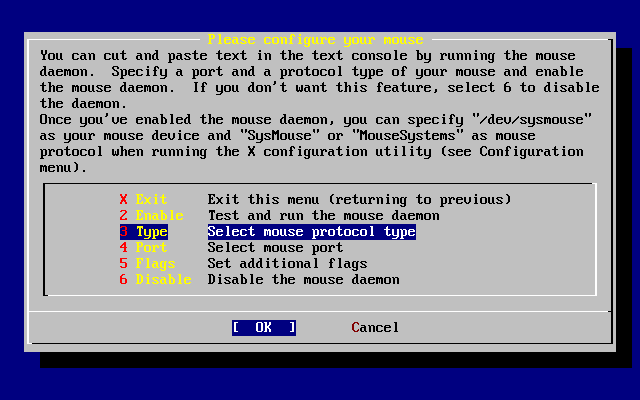
Use the arrow keys to select and press Enter.
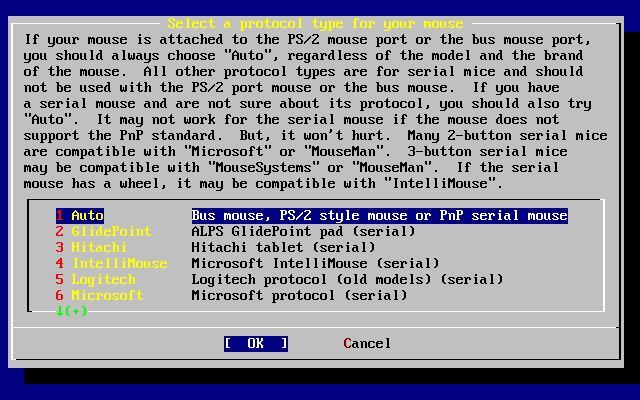
The mouse used in this example is a PS/2 type, so the default is appropriate. To change the mouse protocol, use the arrow keys to select another option. Ensure that is highlighted and press Enter to exit this menu.

Use the arrow keys to select and press Enter.
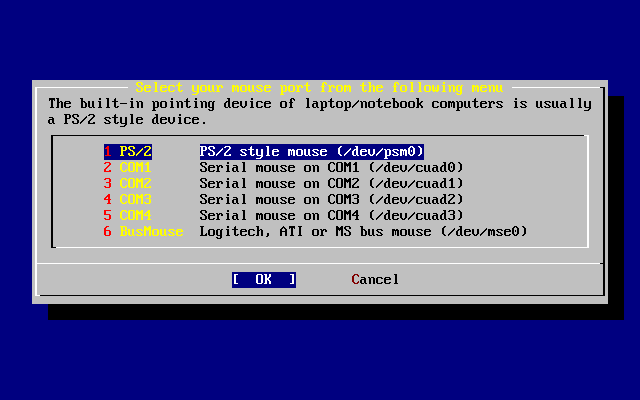
This system had a PS/2 mouse, so the default is appropriate. To change the port, use the arrow keys and then press Enter.
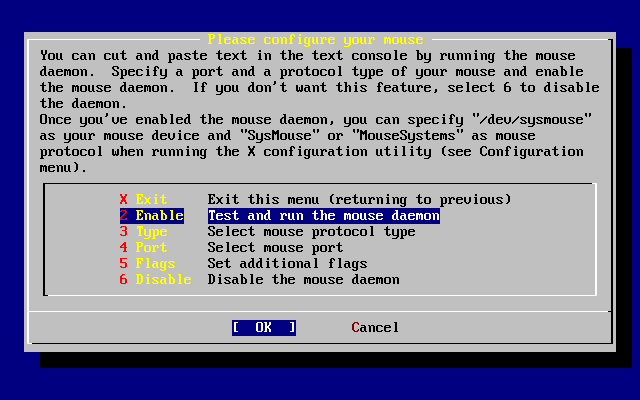
Last, use the arrow keys to select , and press Enter to enable and test the mouse daemon.
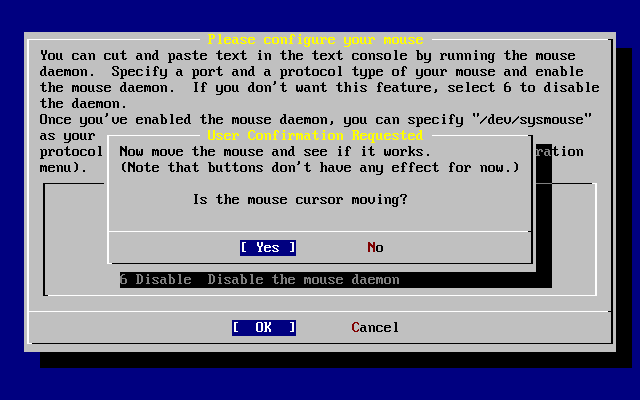
Move the mouse around the screen to verify that the cursor responds properly. If it does, select and press Enter. If not, the mouse has not been configured correctly. Select and try using different configuration options.
Select with the arrow keys and press Enter to continue with the post-installation configuration.
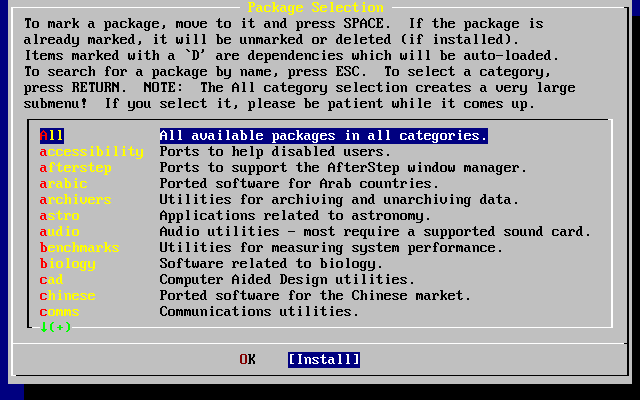
Packages are pre-compiled binaries and are a convenient way to install software.
Installation of one package is shown for purposes of illustration. Additional packages can also be added at this time if desired. After installation, sysinstall(8) can be used to add additional packages.
Select and press Enter to be presented with the Package Selection screens:

Only packages on the current installation media are available for installation at any given time.
All packages available will be displayed if is selected. Otherwise, select a particular category. Highlight the selection with the arrow keys and press Enter.
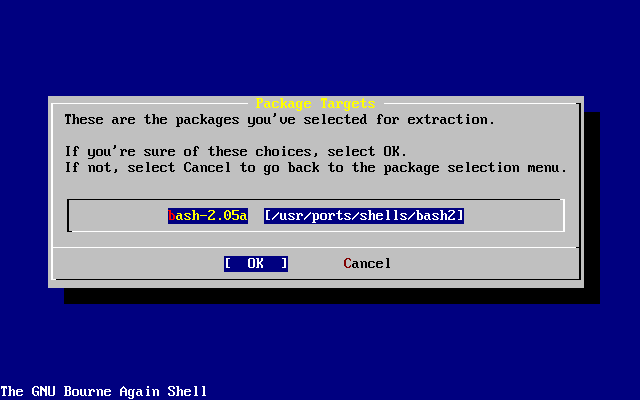
A menu will display showing all the packages available for the selection made:
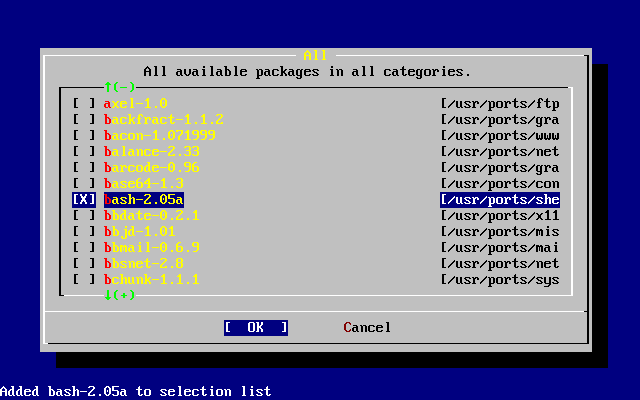
The bash shell is shown as selected. Select as many packages as desired by highlighting the package and pressing Space. A short description of each package will appear in the lower left corner of the screen.
Press Tab to toggle between the last selected package, , and .
Once finished marking the packages for installation, press Tab once to toggle to and press Enter to return to the Package Selection menu.
The left and right arrow keys will also toggle between and . This method can also be used to select and press Enter to return to the Package Selection menu.
Use the Tab and arrow keys to select and press Enter to see the installation confirmation message:
Select and press Enter to start the package installation. Installation messages will appear until all of the installations have completed. Make note if there are any error messages.
The final configuration continues after packages are installed. If no packages are selected, select to return to the final configuration.
Add at least one user during the installation so
that the system can be used without logging in as
root. The root partition is generally small
and running applications as root can quickly
fill it. A bigger danger is noted below:
Select and press Enter to continue with adding a user.
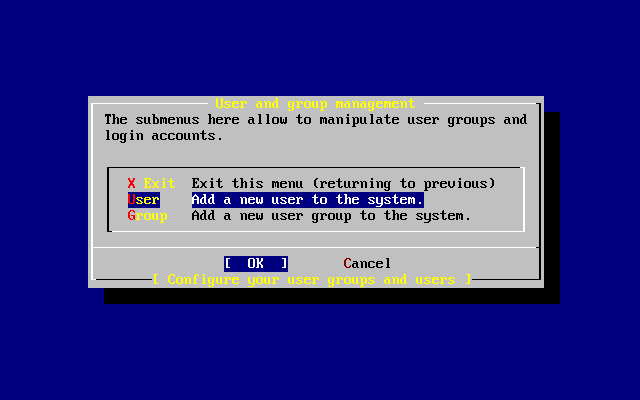
Select with the arrow keys and press Enter.

The following descriptions will appear in the lower part of the screen as the items are selected with Tab to assist with entering the required information:
- Login ID
The login name of the new user (mandatory).
- UID
The numerical ID for this user (leave blank for automatic choice).
- Group
The login group name for this user (leave blank for automatic choice).
- Password
The password for this user (enter this field with care!).
- Full name
The user's full name (comment).
- Member groups
The groups this user belongs to.
- Home directory
The user's home directory (leave blank for default).
- Login shell
The user's login shell (leave blank for default of
/bin/sh).
In this example, the login shell was changed from
/bin/sh to
/usr/local/bin/bash to use the
bash shell that was previously installed as
a package. Do not use a shell that does not exist or the user
will
not be able to login. The most common shell used in FreeBSD
is the C shell,
/bin/tcsh.
The user was also added to the wheel group
to be able to become a superuser with root
privileges.
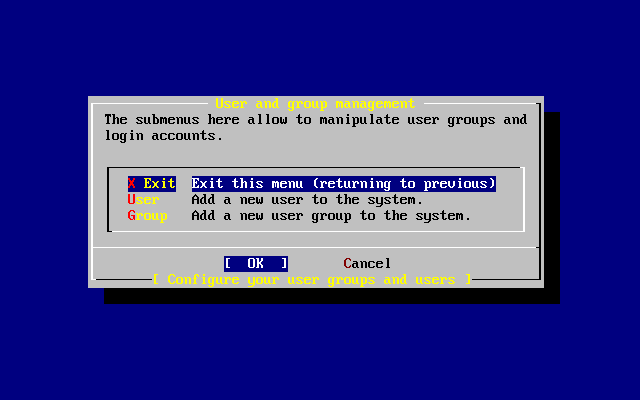
Once satisfied, press and the User and Group Management menu will redisplay:
Groups can also be added at this time. Otherwise, this menu may be accessed using sysinstall(8) at a later time.
When finished adding users, select with the arrow keys and press Enter to continue the installation.
Press Enter to set the root
password.
The password will need to be typed in twice correctly. Do not forget this password. Notice that the typed password is not echoed, nor are asterisks displayed.
The installation will continue after the password is successfully entered.
A message will ask if configuration is complete:
Select with the arrow keys and press Enter to return to the Main Installation Menu.
Select with the arrow keys and press Enter. The installer will prompt to confirm exiting the installation:
Select . If booting from the CDROM drive, the following message will remind you to remove the disk:
The CDROM drive is locked until the machine starts to reboot, then the disk can quickly be removed from the drive. Press to reboot.
The system will reboot so watch for any error messages that may appear, see Section 3.10.15, “FreeBSD Bootup” for more details.
Configuring network services can be a daunting task for users that lack previous knowledge in this area. Since networking and the Internet are critical to all modern operating systems, it is useful to have some understanding of FreeBSD's extensive networking capabilities.
Network services are programs that accept input from
anywhere on the network. Since
there have been cases where bugs in network services have been
exploited by attackers, it is important to
only enable needed network services. If
in doubt, do not enable a network service until
it is needed. Services can be enabled
with sysinstall(8) or by
editing
/etc/rc.conf.
Selecting the option will display a menu similar to the one below:
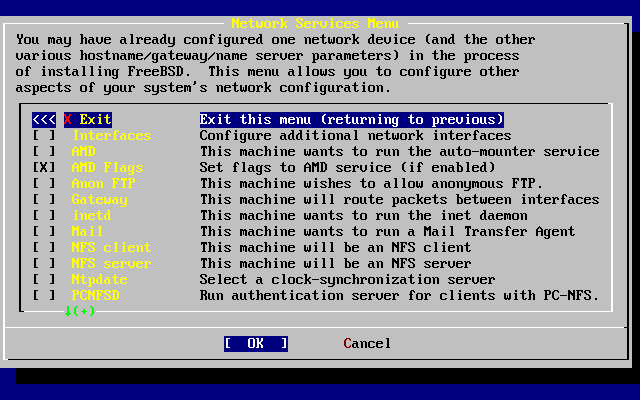
The first option, , is covered in Section 3.10.1, “Network Device Configuration”.
Selecting the option adds support for amd(8). This is usually used in conjunction with NFS for automatically mounting remote filesystems.
Next is the option. When selected, a menu will pop up where specific AMD flags can be entered. The menu already contains a set of default options:
-a sets the default mount
location which is specified here as
/.amd_mnt. -l
specifies the default log;
however, when syslogd(8) is used, all log
activity will be sent to the system log daemon.
/host is used
to mount an exported file system from a remote
host, while /net
is used to mount an exported filesystem from an
IP address. The default
options for AMD exports are defined in
/etc/amd.map.
The option permits anonymous FTP connections. Select this option to make this machine an anonymous FTP server. Be aware of the security risks involved with this option. Another menu will be displayed to explain the security risks and configuration in depth.
The menu will configure the machine to be a gateway. This menu can also be used to unset the option if it was accidentally selected during installation.
The option can be used to configure or completely disable inetd(8).
The option is used to configure the system's default Mail Transfer Agent (MTA). Selecting this option will bring up the following menu:

This menu offers a choice as to which MTA to install and set as the default. An MTA is a mail server which delivers email to users on the system or the Internet.
Select to install Sendmail as the default MTA. Select to set Sendmail as the default MTA, but disable its ability to receive incoming email from the Internet. The other options, and , provide alternatives to Sendmail.
The next menu after the MTA menu is . This menu is used to configure the system to communicate with a NFS server which in turn is used to make filesystems available to other machines on the network over the NFS protocol. See Section 29.3, “Network File System (NFS)” for more information about client and server configuration.
Below that option is the option, for setting the system up as an NFS server. This adds the required information to start up the Remote Procedure Call RPC services. RPC is used to coordinate connections between hosts and programs.
Next in line is the option, which deals with time synchronization. When selected, a menu like the one below shows up:
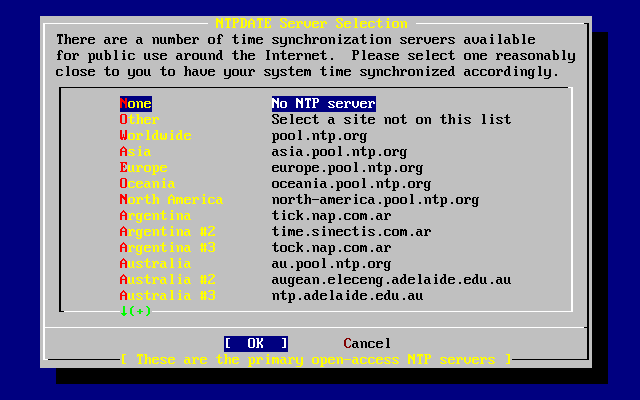
From this menu, select the server which is geographically closest. This will make the time synchronization more accurate as a farther server may have more connection latency.
The next option is the PCNFSD selection.
This option will install the
net/pcnfsd package from
the Ports Collection. This is a useful utility which provides
NFS authentication services for systems which
are unable to provide their own, such as Microsoft's
MS-DOS® operating system.
Now, scroll down a bit to see the other options:
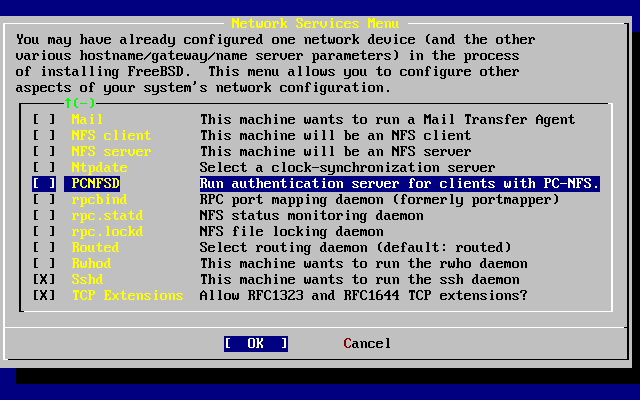
RPC.
communication
between NFS servers and clients is managed
by rpcbind(8) which is
required for NFS servers to operate
correctly. Status monitoring is provided by
rpc.statd(8) and the reported status is usually held
in /var/db/statd.status. The
next option is for rpc.lockd(8)
which provides file locking
services. This is usually used with
rpc.statd(8) to monitor which hosts are
requesting locks and how frequently they request them.
While these last two options are useful for debugging, they
are not required for NFS servers and clients
to operate correctly.
The next menu,
, configures the routing
daemon.
routed(8), manages network routing tables,
discovers multicast routers, and supplies a copy of the routing
tables to any physically connected host on the network upon
request. This is mainly used for machines which act as a
gateway for the local network. If selected, a menu will
request the default location of the utility.
To accept the default location,
press Enter. Yet
another menu will ask for the
flags to pass to routed(8). The
default of -q should appear
on the screen.
The next menu, , starts rwhod(8) during system initialization. This utility broadcasts system messages across the network periodically, or collects them when in “consumer” mode. More information can be found in ruptime(1) and rwho(1).
The next to last option in the list is for sshd(8), the secure shell server for OpenSSH. It is highly recommended over the standard telnetd(8) and ftpd(8) servers as it is used to create a secure, encrypted connection from one host to another.
The final option is which are defined in RFC 1323 and RFC 1644. While on many hosts this can speed up connections, it can also cause some connections to be dropped. It is not recommended for servers, but may be beneficial for stand alone machines.
Once the network services are configured, scroll up to the very top item which is and continue on to the next configuration item or simply exit sysinstall(8) by selecting twice then .
If everything went well, messages will scroll along the screen and a login prompt will appear. To view these messages, press Scroll-Lock then use PgUp and PgDn. Press Scroll-Lock again to return to the prompt.
All of the messages may not display due to buffer limitations, but they can be read after logging using dmesg(8).
Login using the username and password which were set
during installation. Avoid logging in as
root except when necessary.
Typical boot messages (version information omitted):
Generating the RSA and DSA keys may take some time on slower machines. This happens only on the initial boot-up of a new installation. Subsequent boots will be faster.
If Xorg has been configured
and a default desktop
chosen, it can be started by typing startx at
the command line.
It is important to properly shutdown the operating
system. Do not just turn off the power. First, become the
superuser using
su(1) and entering the
root password. This will work only if the user
is a member of wheel.
Otherwise, login as root. To shutdown
the system, type
shutdown -h now.
It is safe to turn off the power after the shutdown command has been issued and the message “Please press any key to reboot” appears. If any key is pressed instead of turning off the power switch, the system will reboot.
The Ctrl+Alt+Del key combination can also be used to reboot the system; however, this is not recommended.